
概述
代理配置分为两个层面:
- 系统代理:由操作系统或 GUI 客户端(如 Clash Verge)管理,主要影响浏览器和 GUI 应用。
- 环境变量代理:通过
http_proxy/https_proxy/ALL_PROXY等环境变量设置,主要影响命令行工具。
两者互相独立。系统代理设置了,终端里的 curl/git/docker 不一定走代理;反之亦然。
一、macOS 系统代理(Clash Verge)
Clash Verge 开启「系统代理」后,会自动配置 macOS 的网络代理设置,浏览器等 GUI 应用会走代理。
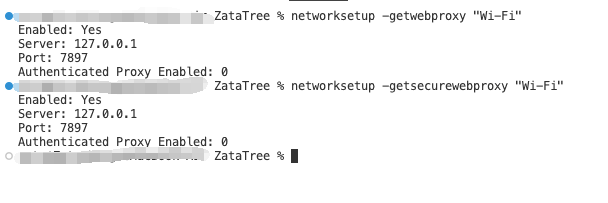
1.1 查看当前系统代理
networksetup -getwebproxy "Wi-Fi"
networksetup -getsecurewebproxy "Wi-Fi"
1.2 绕过列表(Bypass)
在 Clash Verge 的「系统代理」设置中配置绕过地址,如:(一般默认就有了)
127.0.0.1, localhost, 192.168.0.0/16, 10.0.0.0/8, 172.16.0.0/12
注意:系统代理的绕过列表主要影响浏览器和 GUI 应用,对命令行工具不生效。
二、Shell 环境变量配置
2.1 基础变量
在 ~/.zshrc(或 ~/.bashrc)中添加:
# 代理地址(根据你的客户端端口修改)
export http_proxy="http://127.0.0.1:7897"
export https_proxy="http://127.0.0.1:7897"
export ALL_PROXY="socks5://127.0.0.1:7897"

# 绕过本地和局域网
export NO_PROXY="127.0.0.1,localhost,::1,192.168.0.0/16,10.0.0.0/8,172.16.0.0/12"
生效:
source ~/.zshrc
2.2 快速开关代理
可以添加别名方便切换:
# ~/.zshrc
alias proxy='export http_proxy=http://127.0.0.1:7897; export https_proxy=http://127.0.0.1:7897; export ALL_PROXY=socks5://127.0.0.1:7897'
alias unproxy='unset http_proxy; unset https_proxy; unset ALL_PROXY'
2.3 只对当前命令生效
http_proxy=http://127.0.0.1:7897 curl -I https://github.com
三、NO_PROXY 绕过详解
3.1 问题现象
Clash Verge 开启系统代理后,curl 访问 localhost 返回 404:
curl http://localhost:8000/api/xxx
# {"detail":"Not Found"}
curl -v 发现请求走了代理:
Uses proxy env variable http_proxy == 'http://127.0.0.1:7897'
3.2 原因
Clash Verge 的绕过列表不影响命令行工具。curl 读取 http_proxy 环境变量后,会尝试通过代理访问 localhost,而代理服务器不认识这个本地地址。
3.3 解决
补充 NO_PROXY 环境变量:
export NO_PROXY="127.0.0.1,localhost,::1,192.168.0.0/16,10.0.0.0/8,172.16.0.0/12"
常见 NO_PROXY 值:
| 地址 | 说明 |
|---|---|
127.0.0.1 | 本地 IPv4 |
localhost | 本地主机名 |
::1 | 本地 IPv6 |
192.168.0.0/16 | 私网 A 段 |
10.0.0.0/8 | 私网 B 段 |
172.16.0.0/12 | 私网 C 段 |
3.4 验证
curl -v http://localhost:8000/health
# 不再出现 "Uses proxy env variable"
四、Git 代理配置
Git 不读取 http_proxy 环境变量(某些版本会读,但不可靠),需要单独配置:
4.1 HTTP/HTTPS 代理
git config --global http.proxy http://127.0.0.1:7897
git config --global https.proxy http://127.0.0.1:7897
4.2 SOCKS5 代理
git config --global http.proxy socks5://127.0.0.1:7897
4.3 取消代理
git config --global --unset http.proxy
git config --global --unset https.proxy
4.4 仅对特定域名配置
git config --global http.https://github.com.proxy http://127.0.0.1:7897
五、Docker 代理配置
Docker 的代理分两个层面:Daemon 代理(影响 docker pull 等命令)和客户端默认代理(影响 docker run / docker build 自动注入的环境变量)。
5.1 Docker 客户端默认代理
配置 ~/.docker/config.json,让 docker run 和 docker build 自动注入代理环境变量:
mkdir -p ~/.docker
~/.docker/config.json:
{
  "proxies": {
    "default": {
      "httpProxy": "http://127.0.0.1:7897",
      "httpsProxy": "http://127.0.0.1:7897",
      "noProxy": "127.0.0.1,localhost,::1"
    }
  }
}
注意:这个配置只影响容器内部和构建过程,不影响 docker pull 拉取镜像。
5.2 Docker Daemon 代理
docker pull 等命令由 Docker Daemon 执行,Daemon 作为系统服务运行,不读取 Shell 环境变量,需要单独配置。
注意:macOS 上的特殊行为
Docker Desktop for Mac 运行在一个轻量级 Linux VM 中,这个 VM 的网络流量经过 macOS 主机的网络栈。因此即使没有在 Docker 中手动配置代理,Clash Verge 等工具开启的 macOS 系统代理也会被 VM “捎带” 走。这会导致:
- 开启 Clash 系统代理时,
docker pull能正常拉取(走了代理) - 关闭 Clash 系统代理后,
docker pull可能失败或极慢(因为原先走代理的流量现在直连不通了)
如果你需要 Docker 在无论系统代理开或关的情况下都能稳定工作,建议显式配置 Daemon 代理(见下方)。
Linux (systemd):
sudo mkdir -p /etc/systemd/system/docker.service.d
sudo tee /etc/systemd/system/docker.service.d/http-proxy.conf << 'EOF'
[Service]
Environment="HTTP_PROXY=http://127.0.0.1:7897"
Environment="HTTPS_PROXY=http://127.0.0.1:7897"
Environment="NO_PROXY=localhost,127.0.0.1,::1"
EOF

sudo systemctl daemon-reload
sudo systemctl restart docker
macOS (Docker Desktop):
Settings → Resources → Proxies → Manual proxy configuration
5.3 容器内代理
运行容器时传入:
docker run -e http_proxy=http://host.docker.internal:7897 \
           -e https_proxy=http://host.docker.internal:7897 \
           -e NO_PROXY="localhost,127.0.0.1" \
           ubuntu
注意:容器内访问宿主机代理,macOS 用 host.docker.internal,Linux 用宿主机的局域网 IP。
六、包管理器代理
6.1 pip
pip install package-name --proxy http://127.0.0.1:7897

# 或设置环境变量
export PIP_PROXY=http://127.0.0.1:7897
6.2 npm
npm config set proxy http://127.0.0.1:7897
npm config set https-proxy http://127.0.0.1:7897

# 取消
npm config delete proxy
npm config delete https-proxy
6.3 uv
# uv 读取标准环境变量
export http_proxy=http://127.0.0.1:7897
export https_proxy=http://127.0.0.1:7897

# 或使用 --native-tls(某些证书问题场景)
uv pip install package-name --native-tls
七、常用工具代理
| 工具 | 代理方式 |
|---|---|
curl | 读取 http_proxy / https_proxy / ALL_PROXY |
wget | 读取 http_proxy / https_proxy,或用 -e http_proxy= |
ssh | 用 -o ProxyCommand="nc -X 5 -x 127.0.0.1:7897 %h %p" |
brew | 读取环境变量,或 HOMEBREW_CURLRC=1 + ~/.curlrc |
go get | 读取 http_proxy / https_proxy |
7.1 curl 指定代理
curl -x http://127.0.0.1:7897 https://api.github.com

# 或 SOCKS5
curl -x socks5://127.0.0.1:7897 https://api.github.com
7.2 wget 指定代理
wget -e http_proxy=http://127.0.0.1:7897 https://example.com
八、一键验证
配置完成后,验证代理是否生效:
# 查看当前代理环境变量
echo "HTTP:  $http_proxy"
echo "HTTPS: $https_proxy"
echo "ALL:   $ALL_PROXY"
echo "NO:    $NO_PROXY"

# 测试外网(应走代理)
curl -s -o /dev/null -w "%{http_code}" https://github.com

# 测试本地(应直连)
curl -v http://localhost:8000 2>&1 | grep -i "proxy"

# 查看出口 IP(对比开关代理)
curl -s https://httpbin.org/ip
九、常见问题
Q1: 终端已经设置了代理,但某些命令还是不生效?
某些工具(如 Git)不读环境变量,需要单独配置。详见上文各节。
Q2: Docker 容器内无法访问宿主机代理?
- macOS: 用
host.docker.internal:7897 - Linux: 用宿主机局域网 IP,如
192.168.1.x:7897 - 或配置 Docker 的
--network host(仅限 Linux)
Q3: NO_PROXY 设置后不生效?
注意大小写:
- 大多数工具读
NO_PROXY - 部分老工具读
no_proxy建议两个都设:
export NO_PROXY="..."
export no_proxy="$NO_PROXY"