Hugging Face transformers.pipeline 教程
pipeline 是 Hugging Face transformers 库提供的高层次接口,可以快速调用预训练模型完成 NLP、图像处理等任务。本教程将带你从基础用法到进阶技巧全面掌握 pipeline。
1. 查看支持的任务类型
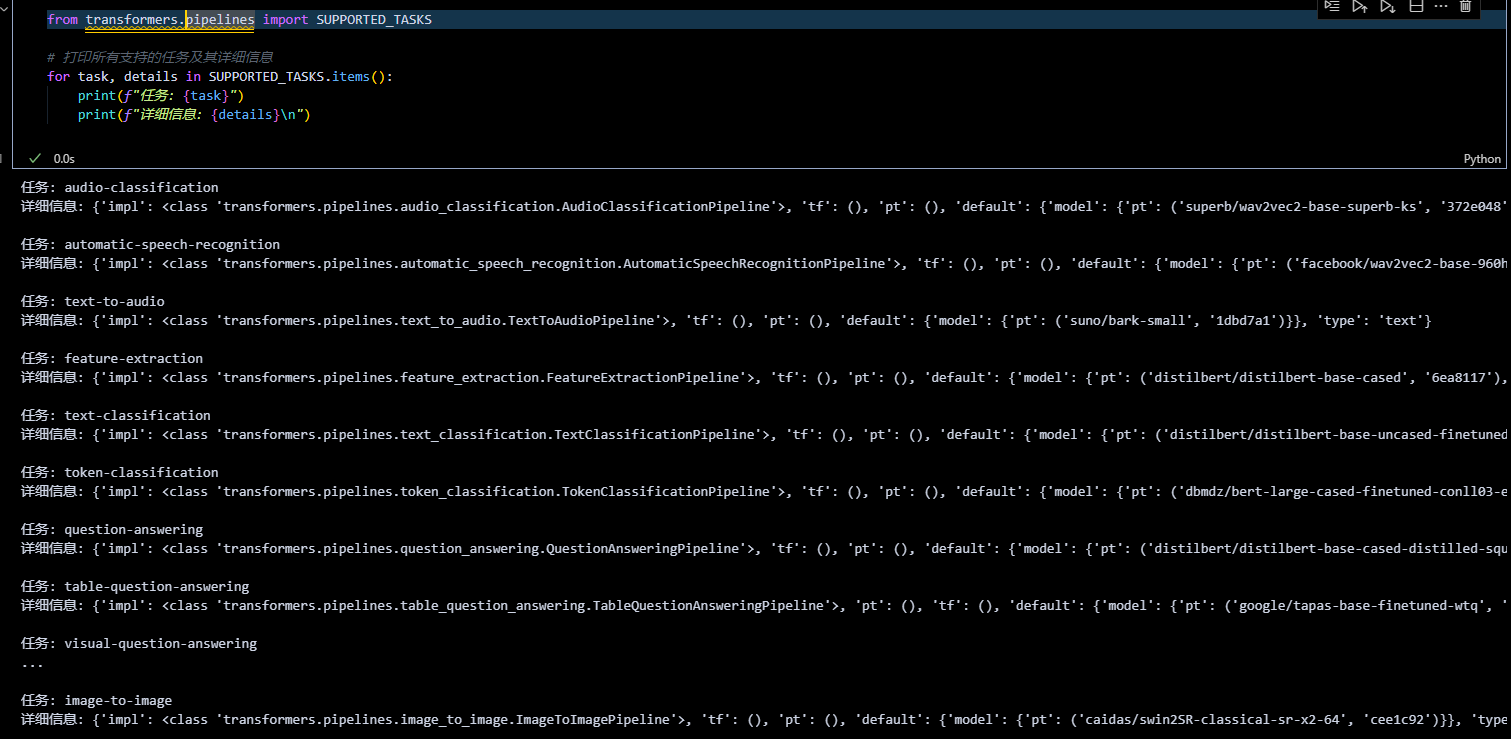
pipeline 支持多种任务,可以通过 SUPPORTED_TASKS 查看:
from transformers.pipelines import SUPPORTED_TASKS

# 打印所有支持的任务及其详细信息
for task, details in SUPPORTED_TASKS.items():
    print(f"任务: {task}")
    print(f"详细信息: {details}\n")
常见任务示例:
text-classification:文本分类(如情感分析)text-generation:文本生成question-answering:问答zero-shot-object-detection:零样本目标检测
完整列表请参考 官方文档。
2. 创建与使用 pipeline
2.1 直接根据任务类型创建(默认模型)
默认使用英文模型,适合快速上手:
from transformers import pipeline

# 创建文本分类 pipeline
pipe = pipeline("text-classification")

# 输入文本列表
results = pipe(["very good!", "very bad!"])
print(results)
输出:
[{'label': 'POSITIVE', 'score': 0.9998}, {'label': 'NEGATIVE', 'score': 0.9987}]
2.2 指定任务和模型
选择特定模型(如中文模型)以适配需求:
# 使用中文情感分析模型
pipe = pipeline("text-classification", model="uer/roberta-base-finetuned-dianping-chinese")

# 分析中文文本
result = pipe("我觉得不太行!")
print(result)
输出:
[{'label': 'negative', 'score': 0.987}]
模型选择:可在 Hugging Face Model Hub 搜索适合的模型。
2.3 预加载模型和分词器
更灵活的方式,先加载模型和分词器,再创建 pipeline:
from transformers import AutoModelForSequenceClassification, AutoTokenizer

# 加载模型和分词器
model = AutoModelForSequenceClassification.from_pretrained("uer/roberta-base-finetuned-dianping-chinese")
tokenizer = AutoTokenizer.from_pretrained("uer/roberta-base-finetuned-dianping-chinese")

# 创建 pipeline
pipe = pipeline("text-classification", model=model, tokenizer=tokenizer)

# 使用
result = pipe("我觉得不太行!")
print(result)
输出:
Device set to use cpu
[{'label': 'negative (stars 1, 2 and 3)', 'score': 0.9735506772994995}]
3. 性能优化:使用 GPU 推理
默认情况下,pipeline 使用 CPU。可以通过 device 参数切换到 GPU:
# 指定 device=0 使用第一个 GPU
pipe = pipeline("text-classification", model="uer/roberta-base-finetuned-dianping-chinese", device=0)

# 检查模型运行设备
print(pipe.model.device)  # 输出: cuda:0

# 测试推理速度
import torch
import time

times = []
for _ in range(100):
    torch.cuda.synchronize()  # 同步 GPU
    start = time.time()
    pipe("我觉得不太行!")
    torch.cuda.synchronize()
    end = time.time()
    times.append(end - start)

print(f"平均推理时间: {sum(times) / 100:.4f} 秒")
对比:在 CPU 上运行相同代码(device=-1),GPU 通常显著更快。
4. 参数调整与高级用法
4.1 问答任务示例
调整参数以控制输出:
qa_pipe = pipeline("question-answering", model="uer/roberta-base-chinese-extractive-qa")

# 输入问题和上下文
result = qa_pipe(
    question="中国的首都是哪里?",
    context="中国的首都是北京",
    max_answer_len=5  # 限制答案长度
)
print(result)
输出:
{'score': 0.99, 'start': 6, 'end': 8, 'answer': '北京'}
4.2 图像任务:零样本目标检测
处理图像任务需要额外依赖(如 Pillow):
from transformers import pipeline
from PIL import Image, ImageDraw
import requests

# 创建零样本目标检测 pipeline
detector = pipeline(model="google/owlvit-base-patch32", task="zero-shot-object-detection")

# 下载并打开图片
url = "https://unsplash.com/photos/oj0zeY2Ltk4/download?force=true&w=640"
img = Image.open(requests.get(url, stream=True).raw)

# 检测对象
predictions = detector(img, candidate_labels=["hat", "sunglasses", "book"])
print(predictions)

# 绘制结果
draw = ImageDraw.Draw(img)
for pred in predictions:
    box = pred["box"]
    draw.rectangle((box["xmin"], box["ymin"], box["xmax"], box["ymax"]), outline="red", width=1)
    draw.text((box["xmin"], box["ymin"]), f"{pred['label']}: {pred['score']:.2f}", fill="red")
img.show()  # 显示图片
5. pipeline 背后的实现
理解底层过程有助于调试和自定义:
from transformers import AutoTokenizer, AutoModelForSequenceClassification
import torch

# 加载分词器和模型
tokenizer = AutoTokenizer.from_pretrained("uer/roberta-base-finetuned-dianping-chinese")
model = AutoModelForSequenceClassification.from_pretrained("uer/roberta-base-finetuned-dianping-chinese")

# 输入文本
input_text = "我觉得不太行!"
inputs = tokenizer(input_text, return_tensors="pt")  # 转换为张量

# 模型推理
outputs = model(**inputs)
logits = outputs.logits
probs = torch.softmax(logits, dim=-1)  # 转换为概率

# 获取预测结果
pred_id = torch.argmax(probs).item()
result = model.config.id2label[pred_id]  # 从 ID 映射到标签
print(f"预测结果: {result}")
输出:
预测结果: negative
流程解析:
- 分词:
tokenizer将文本转为模型可理解的输入。 - 推理:
model输出 logits(原始分数)。 - 后处理:通过
softmax和argmax转换为标签。
6. 注意事项与技巧
- 模型下载:首次运行会自动下载模型,需联网。
- 中文支持:选择中文模型(如
uer/roberta-base-chinese)以提升效果。 - 参数调整:如
max_length、truncation=True可处理长文本。 - 硬件:大型模型建议使用 GPU(检查
torch.cuda.is_available())。
7. 结语
通过 pipeline,你可以快速实现从文本分类到图像检测的多种任务。如果需要更深入的定制,可以参考底层实现部分,或访问 Hugging Face 文档。