基础概念
什么是 Pytest?
Pytest 是一个成熟、功能丰富的 Python 测试框架。与 Python 内置的 unittest 框架相比,Pytest 具有以下核心优势:
- 更少的样板代码:测试用例就是函数,不需要继承任何类。
- 更强大的断言:直接使用 Python 的
assert语句,失败时能提供详细的上下文信息,无需记忆assertEqual,assertTrue等方法。 - 强大的 Fixture (夹具):以一种优雅、模块化的方式管理测试的依赖和状态(如数据库连接、临时文件等)。
- 丰富的插件生态:拥有数百个高质量的插件,如
pytest-cov(测试覆盖率)、pytest-xdist(分布式测试)、pytest-django(Django集成) 等。 - 灵活的测试发现:自动发现并执行项目中的测试文件和测试函数。
- 清晰的输出信息:默认提供简洁明了的测试报告。
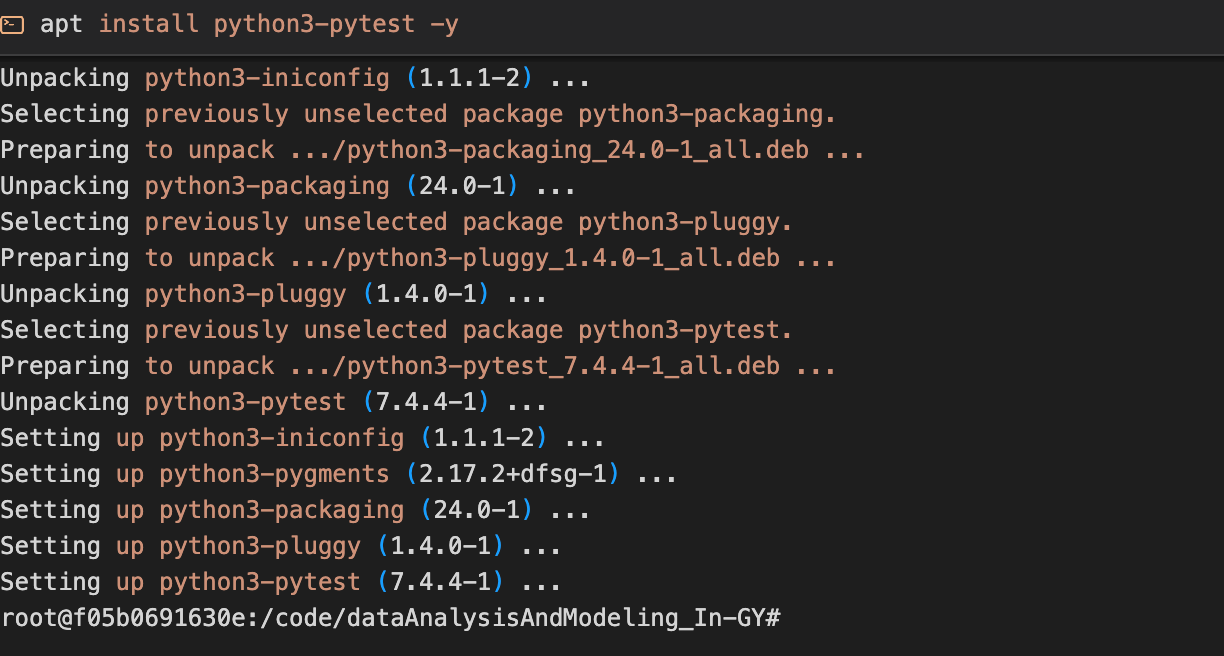
1. 安装
首先,你需要通过 pip 安装 pytest:
pip install pytest
2. 你的第一个测试
Pytest 的测试发现机制遵循一些简单的规则:
- 文件名以
test_*.py或*_test.py格式命名。 - 文件内,以
test_开头的函数会被识别为测试函数。 - 文件内,包含以
test_开头的方法的Test开头的类(不能有__init__方法)会被识别为测试类。
示例:
假设我们有一个简单的函数需要测试。
project/calculator.py
# 一个简单的计算器模块
def add(a, b):
    return a + b

def subtract(a, b):
    return a - b
现在,在同一个目录下创建一个测试文件。
project/test_calculator.py
# 导入需要测试的函数
from calculator import add

# 这是一个测试函数
def test_add():
    # 使用 assert 语句进行断言
    assert add(2, 3) == 5
    assert add(-1, 1) == 0
    assert add(-1, -1) == -2

def test_add_strings():
    # 这个测试预期会失败,因为 add 函数不支持字符串
    assert add('a', 'b') == 'ab'
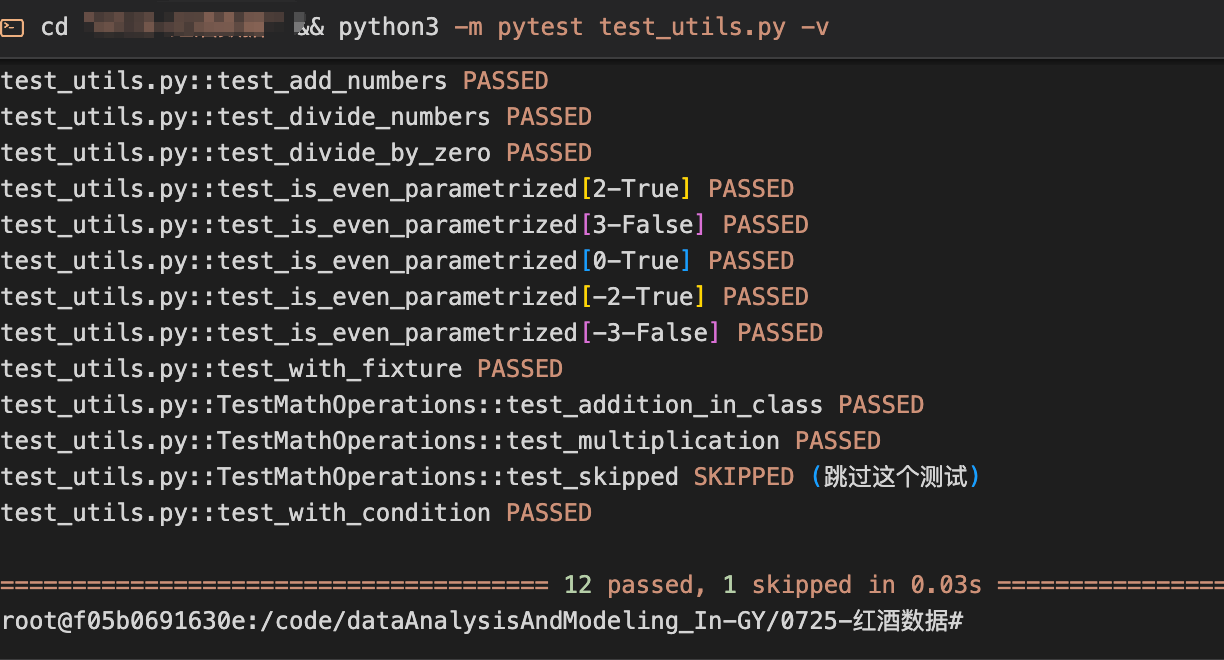
3. 运行测试
在你的终端中,切换到 project 目录,然后执行 pytest 命令。
cd project
pytest
你会看到类似以下的输出:
============================= test session starts ==============================
platform linux -- Python 3.9.5, pytest-8.2.2, pluggy-1.5.0
rootdir: /path/to/project
collected 2 items

test_calculator.py .F                                                    [100%]

=================================== FAILURES ===================================
______________________________ test_add_strings ______________________________

    def test_add_strings():
        # 这个测试预期会失败,因为 add 函数不支持字符串
>       assert add('a', 'b') == 'ab'
E       TypeError: unsupported operand type(s) for +: 'int' and 'str'

test_calculator.py:14: TypeError
=========================== short test summary info ============================
FAILED test_calculator.py::test_add_strings - TypeError: unsupported operand...
========================= 1 failed, 1 passed in 0.02s ==========================
输出解读:
.(点) 代表一个通过的测试 (test_add)。F代表一个失败的测试 (test_add_strings)。- Pytest 详细地展示了
test_add_strings失败的原因 (TypeError) 和失败发生在哪一行代码,这就是assert的强大之处。
常用运行选项:
- 详细模式 (
-v):显示每个测试函数的全名和结果。pytest -v - 运行指定文件:
pytest test_calculator.py - 使用关键字 (
-k) 运行特定测试:运行函数名中包含 “add” 的测试。pytest -k "add" - 遇到第一个失败就停止 (
-x):pytest -x
Fixture (夹具):管理测试依赖
Fixture 是 Pytest 的核心功能,用于为测试提供一个固定的基线状态。它们是管理 setup 和 teardown 逻辑的首选方式。
使用场景
- 创建一个数据库连接。
- 创建一个临时目录或文件。
- 提供一个可复用的数据对象。
基本用法
假设我们需要一个临时文件来进行测试。
# test_file.py
import pytest
import os

# 定义一个 fixture
@pytest.fixture
def temp_file(tmp_path): # tmp_path 是 pytest 内置的更现代的 fixture
    # Setup: 创建一个临时文件并写入内容
    file_path = tmp_path / "test.txt"
    file_path.write_text("hello pytest")

    # yield 关键字返回资源,测试函数会在这里执行
    yield file_path

    # Teardown: 这里可以写清理代码,但 tmp_path 会自动清理
    # print("\nCleaning up the file")

# 在测试函数中,把 fixture 的名字作为参数传入
def test_read_from_temp_file(temp_file):
    with open(temp_file, "r") as f:
        content = f.read()
    assert content == "hello pytest"
@pytest.fixture装饰器定义了一个 fixture。- 测试函数
test_read_from_temp_file通过参数名temp_file来声明它需要使用这个 fixture。 yield之前是 setup 代码,yield之后是 teardown (清理) 代码。tmp_path是 Pytest 内置的一个 fixture,用于创建临时目录,是比tmpdir更推荐的方式。
Fixture 的作用域 (scope)
Fixture 可以在多个测试之间共享,以提高效率。scope 参数控制其生命周期:
function(默认): 每个测试函数都运行一次。class: 每个测试类只运行一次。module: 每个模块只运行一次。session: 整个测试会话只运行一次(所有测试开始前创建,结束后销毁)。
@pytest.fixture(scope="session")
def db_connection():
    # 假设这里是连接数据库的昂贵操作
    print("\nSetting up DB connection for the session")
    conn = ... # connect_to_db()
    yield conn
    print("\nTearing down DB connection for the session")
    conn.close()
Pytest 常用内置 Fixtures
Pytest 提供了许多强大的内置 fixtures,它们可以直接在测试函数中使用,无需额外定义。这些 fixtures 覆盖了从临时文件管理到输出捕获、对象 Mock 等常见测试场景。
1. tmp_path: 临时目录管理
tmp_path 是一个 function 级别的 fixture,它为每个测试函数提供一个独立的临时目录(pathlib.Path 对象)。测试结束后,该目录会被自动清理。
使用场景:
- 需要创建临时文件或目录
- 测试文件读写操作
- 隔离每个测试的文件系统状态
示例:
import pytest
from pathlib import Path

def test_create_file(tmp_path):
    """测试在临时目录中创建文件"""
    # tmp_path 是一个 pathlib.Path 对象
    assert tmp_path.is_dir()

    # 创建一个临时文件
    test_file = tmp_path / "test.txt"
    test_file.write_text("Hello, pytest!")

    # 验证文件内容
    assert test_file.read_text() == "Hello, pytest!"
    assert test_file.exists()

def test_create_nested_directories(tmp_path):
    """测试创建嵌套目录结构"""
    # 创建嵌套目录
    nested_dir = tmp_path / "level1" / "level2" / "level3"
    nested_dir.mkdir(parents=True)

    # 在嵌套目录中创建文件
    data_file = nested_dir / "data.json"
    data_file.write_text('{"key": "value"}')

    assert data_file.exists()
    assert data_file.parent == nested_dir

def test_multiple_files(tmp_path):
    """测试处理多个文件"""
    # 创建多个测试文件
    for i in range(5):
        file = tmp_path / f"file_{i}.txt"
        file.write_text(f"Content {i}")

    # 验证所有文件都被创建
    files = list(tmp_path.glob("*.txt"))
    assert len(files) == 5
最佳实践:
- 优先使用
tmp_path而不是旧的tmpdirfixture(tmp_path返回pathlib.Path对象,更现代化) - 不需要手动清理临时文件,Pytest 会自动处理
- 每个测试函数获得独立的临时目录,避免测试间相互影响
2. tmp_path_factory: 跨测试会话的临时目录
tmp_path_factory 是一个 session 级别的 fixture,用于创建可以在多个测试之间共享的临时目录。它特别适合需要在整个测试会话中持久化某些数据的场景。
使用场景:
- 创建昂贵的测试数据(如大型数据集)并在多个测试中复用
- 需要跨多个测试共享文件系统状态
- 生成测试报告或日志文件
示例:
import pytest
from pathlib import Path

# 使用 tmp_path_factory 创建 session 级别的共享临时目录
@pytest.fixture(scope="session")
def shared_data_dir(tmp_path_factory):
    """创建一个会话级别的共享数据目录"""
    # 使用 mktemp 方法创建临时目录
    data_dir = tmp_path_factory.mktemp("shared_data")

    # 在这里可以生成一些昂贵的测试数据
    config_file = data_dir / "config.json"
    config_file.write_text('{"db": "test_db", "port": 5432}')

    return data_dir

def test_read_shared_config(shared_data_dir):
    """从共享目录读取配置"""
    config_file = shared_data_dir / "config.json"
    assert config_file.exists()
    content = config_file.read_text()
    assert "test_db" in content

def test_add_to_shared_dir(shared_data_dir):
    """向共享目录添加新文件"""
    new_file = shared_data_dir / "test_results.txt"
    new_file.write_text("Test passed")

    assert new_file.exists()

# 在 conftest.py 中使用 tmp_path_factory 的高级示例
@pytest.fixture(scope="session")
def test_dataset(tmp_path_factory):
    """生成一个大型测试数据集(仅生成一次)"""
    dataset_dir = tmp_path_factory.mktemp("dataset")

    # 模拟生成大量数据文件
    for i in range(100):
        data_file = dataset_dir / f"data_{i}.csv"
        data_file.write_text(f"id,value\n{i},{i*10}")

    return dataset_dir

def test_dataset_exists(test_dataset):
    """验证数据集已生成"""
    files = list(test_dataset.glob("*.csv"))
    assert len(files) == 100

def test_dataset_content(test_dataset):
    """验证数据集内容"""
    first_file = test_dataset / "data_0.csv"
    assert first_file.read_text() == "id,value\n0,0"
最佳实践:
- 用于创建昂贵的、可复用的测试资源
- 结合
scope="session"或scope="module"的 fixture 使用 - 注意:共享状态可能导致测试间的依赖,需谨慎使用
3. capsys / capfd: 捕获输出
capsys 和 capfd fixtures 用于捕获测试期间产生的标准输出(stdout)和标准错误(stderr)。
capsys: 捕获 sys.stdout 和 sys.stderr(Python 级别)capfd: 捕获文件描述符 1 和 2 的输出(系统级别,包括 C 扩展的输出)
使用场景:
- 测试打印输出的函数
- 验证日志信息
- 测试命令行工具的输出
示例:
import pytest
import sys

def greet(name):
    """打印问候信息"""
    print(f"Hello, {name}!")
    return True

def warn_user(message):
    """向 stderr 输出警告"""
    print(f"WARNING: {message}", file=sys.stderr)

# 使用 capsys 捕获输出
def test_greet_output(capsys):
    """测试问候函数的输出"""
    result = greet("Alice")

    # 捕获输出
    captured = capsys.readouterr()

    # 验证标准输出
    assert captured.out == "Hello, Alice!\n"
    assert captured.err == ""
    assert result is True

def test_warning_output(capsys):
    """测试警告输出"""
    warn_user("Low disk space")

    captured = capsys.readouterr()

    # 验证标准错误输出
    assert "WARNING: Low disk space" in captured.err
    assert captured.out == ""

def test_multiple_outputs(capsys):
    """测试多次输出"""
    print("First line")
    print("Second line")

    # 第一次读取
    captured = capsys.readouterr()
    assert "First line\nSecond line\n" == captured.out

    # 读取后输出会被清空
    print("Third line")
    captured = capsys.readouterr()
    assert captured.out == "Third line\n"

# 使用 disabled() 临时禁用捕获
def test_with_disabled_capture(capsys):
    """在测试中临时禁用输出捕获"""
    print("This will be captured")

    with capsys.disabled():
        # 这段输出不会被捕获,会直接显示在控制台
        print("This will be shown in the console")

    print("This will be captured again")

    captured = capsys.readouterr()
    assert "This will be captured" in captured.out
    assert "This will be captured again" in captured.out
    assert "This will be shown in the console" not in captured.out
高级用法:
import subprocess

def test_subprocess_output(capfd):
    """测试子进程的输出(需要使用 capfd)"""
    # capfd 可以捕获 C 级别的输出
    subprocess.run(["echo", "Hello from subprocess"])

    captured = capfd.readouterr()
    assert "Hello from subprocess" in captured.out
最佳实践:
- 大多数情况下使用
capsys即可 - 只有在需要捕获 C 扩展或子进程输出时才使用
capfd - 使用
readouterr()后,输出缓冲区会被清空 - 使用
disabled()上下文管理器可以临时禁用捕获,方便调试
4. monkeypatch: Mock 和修改对象
monkeypatch fixture 是一个强大的工具,用于在测试期间安全地修改对象、字典、环境变量等。所有修改会在测试结束后自动恢复,不会影响其他测试。
使用场景:
- Mock 函数或类方法
- 修改环境变量
- 修改对象属性
- 临时更改字典内容
- 修改 sys.path 或其他系统配置
示例:
import pytest
import os
import requests

# 示例模块代码
class APIClient:
    def get_data(self):
        """从远程 API 获取数据"""
        response = requests.get("https://api.example.com/data")
        return response.json()

def get_env_config():
    """从环境变量读取配置"""
    return {
        "host": os.getenv("DB_HOST", "localhost"),
        "port": int(os.getenv("DB_PORT", "5432")),
        "debug": os.getenv("DEBUG", "False") == "True"
    }

# 测试:Mock 函数
def test_mock_function(monkeypatch):
    """使用 monkeypatch 替换函数"""
    def mock_get(*args, **kwargs):
        """模拟 requests.get 的返回值"""
        class MockResponse:
            def json(self):
                return {"status": "success", "data": [1, 2, 3]}
        return MockResponse()

    # 替换 requests.get 函数
    monkeypatch.setattr(requests, "get", mock_get)

    # 现在调用 API 会使用我们的 mock 函数
    client = APIClient()
    result = client.get_data()

    assert result["status"] == "success"
    assert result["data"] == [1, 2, 3]

# 测试:修改环境变量
def test_modify_env_vars(monkeypatch):
    """修改环境变量"""
    # 设置环境变量
    monkeypatch.setenv("DB_HOST", "test-server")
    monkeypatch.setenv("DB_PORT", "9999")
    monkeypatch.setenv("DEBUG", "True")

    config = get_env_config()

    assert config["host"] == "test-server"
    assert config["port"] == 9999
    assert config["debug"] is True

# 测试:删除环境变量
def test_delete_env_var(monkeypatch):
    """删除环境变量"""
    # 先设置一个环境变量
    monkeypatch.setenv("TEMP_VAR", "value")
    assert os.getenv("TEMP_VAR") == "value"

    # 删除它
    monkeypatch.delenv("TEMP_VAR")
    assert os.getenv("TEMP_VAR") is None

# 测试:修改对象属性
def test_modify_object_attr(monkeypatch):
    """修改对象属性"""
    class Config:
        timeout = 30
        retries = 3

    # 修改类属性
    monkeypatch.setattr(Config, "timeout", 60)
    monkeypatch.setattr(Config, "retries", 5)

    assert Config.timeout == 60
    assert Config.retries == 5

# 测试:修改字典
def test_modify_dict(monkeypatch):
    """修改字典内容"""
    cache = {"user": "admin", "token": "abc123"}

    # 修改字典项
    monkeypatch.setitem(cache, "user", "test_user")
    monkeypatch.setitem(cache, "role", "tester")

    assert cache["user"] == "test_user"
    assert cache["role"] == "tester"

    # 删除字典项
    monkeypatch.delitem(cache, "token")
    assert "token" not in cache

# 测试:修改 sys.path
def test_modify_syspath(monkeypatch):
    """临时修改 sys.path"""
    import sys

    original_length = len(sys.path)

    # 添加路径
    monkeypatch.syspath_prepend("/custom/path")

    assert sys.path[0] == "/custom/path"
    assert len(sys.path) == original_length + 1
    # 测试结束后 sys.path 会自动恢复

# 测试:修改当前工作目录
def test_change_directory(monkeypatch, tmp_path):
    """临时修改当前工作目录"""
    # 创建一个临时目录
    test_dir = tmp_path / "test_workspace"
    test_dir.mkdir()

    # 修改当前工作目录
    monkeypatch.chdir(test_dir)

    assert os.getcwd() == str(test_dir)
    # 测试结束后会自动恢复到原始目录
常用方法总结:
| 方法 | 说明 | 示例 |
|---|---|---|
setattr(obj, name, value) | 设置对象属性 | monkeypatch.setattr(os, "getcwd", lambda: "/fake") |
delattr(obj, name) | 删除对象属性 | monkeypatch.delattr(os, "environ") |
setitem(dict, key, value) | 设置字典项 | monkeypatch.setitem(os.environ, "USER", "test") |
delitem(dict, key) | 删除字典项 | monkeypatch.delitem(os.environ, "USER") |
setenv(name, value) | 设置环境变量 | monkeypatch.setenv("DEBUG", "1") |
delenv(name) | 删除环境变量 | monkeypatch.delenv("DEBUG") |
syspath_prepend(path) | 在 sys.path 开头添加路径 | monkeypatch.syspath_prepend("/path") |
chdir(path) | 修改当前工作目录 | monkeypatch.chdir("/tmp") |
最佳实践:
- 所有修改会在测试结束后自动撤销,无需手动清理
- 优先使用
monkeypatch而不是直接修改全局状态 - 适合替代复杂的 mock 库(如 unittest.mock)进行简单的 mock 操作
5. request: 访问测试请求信息
request fixture 提供了关于当前测试请求的信息,包括测试函数、模块、参数等元数据。它在创建高级 fixtures 时特别有用。
使用场景:
- 在 fixture 中访问测试函数的信息
- 根据测试参数动态配置 fixture
- 实现 fixture 的终结器(finalizer)
- 访问测试的 markers 和配置
示例:
import pytest

# 基础用法:访问测试信息
@pytest.fixture
def show_test_info(request):
    """显示当前测试的信息"""
    print(f"\n测试函数名: {request.node.name}")
    print(f"测试模块: {request.module.__name__}")
    print(f"测试文件路径: {request.fspath}")

def test_example(show_test_info):
    """一个示例测试"""
    assert True

# 使用 request.param 访问参数化数据
@pytest.fixture
def db_connection(request):
    """根据参数创建不同类型的数据库连接"""
    db_type = request.param  # 获取参数化的值

    print(f"\n正在连接到 {db_type} 数据库")

    # 根据数据库类型创建不同的连接
    connections = {
        "sqlite": {"type": "sqlite", "path": ":memory:"},
        "postgres": {"type": "postgres", "host": "localhost"},
        "mysql": {"type": "mysql", "host": "localhost"}
    }

    conn = connections.get(db_type)
    yield conn

    print(f"\n关闭 {db_type} 数据库连接")

@pytest.mark.parametrize("db_connection", ["sqlite", "postgres", "mysql"], indirect=True)
def test_database_operations(db_connection):
    """测试不同数据库的操作"""
    assert db_connection["type"] in ["sqlite", "postgres", "mysql"]
    print(f"当前使用的数据库: {db_connection['type']}")

# 使用 request.addfinalizer 注册清理函数
@pytest.fixture
def resource_with_finalizer(request):
    """使用 finalizer 进行资源清理"""
    print("\n设置资源")
    resource = {"status": "active", "data": []}

    def cleanup():
        """清理函数"""
        print("\n清理资源(使用 finalizer)")
        resource["status"] = "closed"

    # 注册清理函数
    request.addfinalizer(cleanup)

    return resource

def test_use_resource(resource_with_finalizer):
    """使用带 finalizer 的资源"""
    assert resource_with_finalizer["status"] == "active"
    resource_with_finalizer["data"].append("test")

# 访问测试的 markers
@pytest.fixture
def config_from_marker(request):
    """根据测试的 marker 提供不同配置"""
    # 检查测试是否有 slow marker
    if request.node.get_closest_marker("slow"):
        return {"timeout": 60, "retries": 5}
    else:
        return {"timeout": 10, "retries": 1}

@pytest.mark.slow
def test_slow_operation(config_from_marker):
    """慢速测试会获得更长的超时时间"""
    assert config_from_marker["timeout"] == 60
    assert config_from_marker["retries"] == 5

def test_fast_operation(config_from_marker):
    """快速测试使用默认配置"""
    assert config_from_marker["timeout"] == 10
    assert config_from_marker["retries"] == 1

# 在 conftest.py 中使用 request 创建灵活的 fixture
@pytest.fixture
def test_data_dir(request, tmp_path):
    """为每个测试创建独立的数据目录"""
    # 使用测试函数名创建目录
    test_name = request.node.name
    data_dir = tmp_path / test_name
    data_dir.mkdir()

    print(f"\n为测试 {test_name} 创建数据目录: {data_dir}")

    return data_dir

def test_first(test_data_dir):
    """第一个测试"""
    assert test_data_dir.name == "test_first"
    (test_data_dir / "file1.txt").write_text("data1")

def test_second(test_data_dir):
    """第二个测试"""
    assert test_data_dir.name == "test_second"
    (test_data_dir / "file2.txt").write_text("data2")

# 访问测试配置
@pytest.fixture
def check_config(request):
    """访问 pytest 配置"""
    config = request.config

    # 获取命令行选项
    verbose = config.getoption("verbose")
    print(f"\n详细模式: {verbose}")

    # 访问 pytest.ini 中的配置
    ini_value = config.getini("testpaths")
    print(f"测试路径配置: {ini_value}")

def test_with_config(check_config):
    """测试配置访问"""
    pass
常用属性和方法:
| 属性/方法 | 说明 | 示例 |
|---|---|---|
request.node | 当前测试节点对象 | request.node.name |
request.module | 测试所在的模块 | request.module.__name__ |
request.function | 测试函数对象 | request.function.__doc__ |
request.fspath | 测试文件路径 | str(request.fspath) |
request.param | 参数化的当前值 | request.param |
request.config | pytest 配置对象 | request.config.getoption("verbose") |
request.addfinalizer(func) | 注册清理函数 | request.addfinalizer(cleanup) |
request.node.get_closest_marker(name) | 获取 marker | request.node.get_closest_marker("slow") |
最佳实践:
- 使用
request.param结合indirect=True实现参数化 fixture - 使用
addfinalizer()代替yield进行清理(当需要多个清理步骤时) - 通过
request.node访问测试元数据,实现动态行为 - 在创建通用的、可配置的 fixtures 时特别有用
使用 conftest.py 共享 Fixture
当多个测试文件需要使用同一个 Fixture 时,我们不应该在每个文件里都写一遍。这时,conftest.py 就派上用场了。
conftest.py 是一个特殊的文件,它的作用是:
- 共享 Fixtures: 定义在
conftest.py中的 Fixture 可以在其所在的目录及所有子目录的测试文件中直接使用,无需导入。 - 存放 Hooks: 可以用来自定义 Pytest 的行为。
- 本地插件库:
conftest.py本质上就是一个本地的插件。
示例:
假设我们的项目结构如下:
project/
├── app/
│   ├── __init__.py
│   └── user_service.py
└── tests/
    ├── conftest.py
    ├── test_user_api.py
    └── test_user_database.py
我们可以将昂贵的数据库连接 Fixture 放在 tests/conftest.py 中。
tests/conftest.py
import pytest

# 一个 session 级别的 fixture,模拟数据库连接
@pytest.fixture(scope="session")
def db_conn():
    print("\n[conftest] Creating DB connection")
    # 模拟连接对象
    conn = {"status": "connected", "data": {}}
    yield conn
    # 清理工作
    print("\n[conftest] Closing DB connection")
    conn["status"] = "closed"

# 使用内置 fixtures 创建共享资源
@pytest.fixture(scope="session")
def shared_tmp_dir(tmp_path_factory):
    """创建会话级别的共享临时目录"""
    return tmp_path_factory.mktemp("shared_data")

@pytest.fixture
def mock_env(monkeypatch):
    """为所有测试提供统一的环境变量配置"""
    monkeypatch.setenv("ENV", "test")
    monkeypatch.setenv("DEBUG", "True")
    return monkeypatch
现在,tests 目录下的所有测试文件都可以直接使用这些 Fixtures。
tests/test_user_api.py
def test_user_creation_api(db_conn):
    # 注意:我们没有从任何地方导入 db_conn
    assert db_conn["status"] == "connected"
    # ... 模拟 API 调用来创建用户
tests/test_user_database.py
def test_user_data_consistency(db_conn, shared_tmp_dir):
    assert db_conn["status"] == "connected"

    # 使用共享临时目录
    data_file = shared_tmp_dir / "test_data.txt"
    data_file.write_text("test")

    # ... 模拟直接检查数据库
当你运行 pytest 时,db_conn Fixture 只会被创建一次,然后被所有需要它的测试函数共享,最后在所有测试结束后被销毁。这就是 conftest.py 和 scope="session" 结合的强大之处。
Markers (标记):组织和控制测试
Markers 用于给测试函数打上标签,方便你对它们进行分组、跳过或标记为预期失败。
常用内置标记
@pytest.mark.skip: 无条件跳过测试。@pytest.mark.skip(reason="Function not implemented yet") def test_new_feature(): ...@pytest.mark.skipif: 根据条件跳过测试。import sys @pytest.mark.skipif(sys.version_info < (3, 8), reason="requires Python 3.8 or higher") def test_modern_syntax(): ...@pytest.mark.xfail: 标记为预期失败 (XFAIL - Expected Failure)。如果测试失败,结果是XFAIL;如果意外通过,结果是XPASS。@pytest.mark.xfail(reason="Bug #123 is not fixed yet") def test_known_bug(): assert some_buggy_function() == False
自定义标记
你可以创建自己的标记来对测试进行分类,例如 “slow”, “api”, “ui”。为了避免拼写错误和警告,最好在 pytest.ini 中注册它们。
pytest.ini (在项目根目录创建此文件)
[pytest]
markers =
    slow: marks tests as slow to run
    api: marks tests related to API calls
test_file.py
import pytest

@pytest.mark.slow
def test_very_slow_operation():
    ...

@pytest.mark.api
def test_api_endpoint():
    ...
运行带有特定标记的测试 (-m)
# 只运行标记为 "slow" 的测试
pytest -m slow

# 运行所有不是 "slow" 的测试
pytest -m "not slow"

# 运行 "api" 或 "slow" 的测试
pytest -m "api or slow"
参数化 (parametrize):用不同数据多次运行同一测试
当你需要用多组不同的输入和输出来测试同一个函数时,参数化非常有用。
import pytest
from calculator import add

# 使用 @pytest.mark.parametrize 装饰器
@pytest.mark.parametrize("input1, input2, expected", [
    (1, 2, 3),          # 测试用例1
    (-1, 1, 0),         # 测试用例2
    (10, 0, 10),        # 测试用例3
    (99, 1, 100),       # 测试用例4
    pytest.param(1, 1, 3, marks=pytest.mark.xfail) # 标记为预期失败的用例
])
def test_add_multiple(input1, input2, expected):
    assert add(input1, input2) == expected
- 第一个参数是参数名的字符串,用逗号分隔。
- 第二个参数是一个列表,列表中的每个元素(通常是元组)对应一组测试数据。
- Pytest 会为每一组数据生成并运行一个独立的测试。
配置文件 (pytest.ini)
pytest.ini 是 Pytest 的主配置文件,通常放在项目的根目录。它可以让你自定义 Pytest 的行为。
一个常见的 pytest.ini 示例:
[pytest]
# 设置默认的命令行参数
addopts = -v --strict-markers -ra

# 指定测试文件所在的目录
testpaths = tests

# 定义自定义标记,避免拼写错误和警告
markers =
    slow: marks tests as slow to run
    smoke: marks tests for smoke testing

# 忽略某些目录或文件
norecursedirs = .git venv *.egg-info
-ra是一个非常有用的参数,它会在测试结束后,简要报告所有通过(p)、失败(f)、跳过(s)等结果的原因。
常用插件
pytest-cov: 生成测试覆盖率报告。pip install pytest-cov pytest --cov=my_project --cov-report=html这会生成一个
htmlcov目录,里面有详细的 HTML 覆盖率报告。pytest-xdist: 并行运行测试,加快执行速度。pip install pytest-xdist pytest -n auto # 'auto' 会根据 CPU 核心数自动决定进程数
实战示例(结合内置 Fixtures 和 conftest.py)
让我们用一个更完整的例子来展示这些概念如何协同工作。
项目结构:
my_project/
├── app/
│   ├── __init__.py
│   ├── math_operations.py
│   └── file_processor.py
├── tests/
│   ├── conftest.py
│   ├── test_math_operations.py
│   └── test_file_processor.py
└── pytest.ini
app/math_operations.py
def add(a, b):
    return a + b

def divide(a, b):
    if b == 0:
        raise ValueError("Cannot divide by zero")
    return a / b
app/file_processor.py
import os

def process_file(file_path):
    """读取文件并返回行数"""
    with open(file_path, 'r') as f:
        lines = f.readlines()
    return len(lines)

def get_config():
    """从环境变量获取配置"""
    return {
        "mode": os.getenv("APP_MODE", "production"),
        "debug": os.getenv("DEBUG", "false").lower() == "true"
    }
tests/conftest.py
import pytest

# 使用 tmp_path_factory 创建共享测试数据
@pytest.fixture(scope="session")
def test_data_dir(tmp_path_factory):
    """创建包含测试数据的共享目录"""
    data_dir = tmp_path_factory.mktemp("test_data")

    # 创建一些测试文件
    (data_dir / "sample.txt").write_text("line1\nline2\nline3")
    (data_dir / "empty.txt").write_text("")

    return data_dir

# 提供统一的环境变量配置
@pytest.fixture
def test_env(monkeypatch):
    """为测试设置环境变量"""
    monkeypatch.setenv("APP_MODE", "test")
    monkeypatch.setenv("DEBUG", "true")

# 定义一个在所有测试函数中都可用的 fixture
@pytest.fixture
def base_data():
    """提供一组基础测试数据"""
    return {"x": 10, "y": 5}
tests/test_math_operations.py
import pytest
from app.math_operations import add, divide

# 测试类,用于组织相关测试
class TestMath:
    # 使用来自 conftest.py 的 fixture
    def test_add(self, base_data):
        result = add(base_data["x"], base_data["y"])
        assert result == 15

    # 参数化测试
    @pytest.mark.parametrize("a, b, expected", [
        (10, 2, 5.0),
        (8, 4, 2.0),
        (-6, 3, -2.0)
    ])
    def test_divide_parametrized(self, a, b, expected):
        assert divide(a, b) == expected

    # 测试异常情况
    def test_divide_by_zero(self):
        with pytest.raises(ValueError, match="Cannot divide by zero"):
            divide(10, 0)
tests/test_file_processor.py
import pytest
from app.file_processor import process_file, get_config

class TestFileProcessor:
    # 使用 tmp_path 创建测试文件
    def test_process_file_with_tmp_path(self, tmp_path):
        """使用 tmp_path 测试文件处理"""
        # 创建临时文件
        test_file = tmp_path / "test.txt"
        test_file.write_text("line1\nline2\nline3\nline4")

        # 测试处理
        result = process_file(test_file)
        assert result == 4

    # 使用共享的测试数据目录
    def test_process_shared_file(self, test_data_dir):
        """使用共享测试数据"""
        sample_file = test_data_dir / "sample.txt"
        result = process_file(sample_file)
        assert result == 3

    def test_process_empty_file(self, test_data_dir):
        """测试空文件"""
        empty_file = test_data_dir / "empty.txt"
        result = process_file(empty_file)
        assert result == 0

class TestConfig:
    # 使用 monkeypatch 测试环境变量
    def test_get_config_with_env(self, test_env):
        """测试从环境变量读取配置"""
        config = get_config()

        assert config["mode"] == "test"
        assert config["debug"] is True

    def test_get_config_default(self, monkeypatch):
        """测试默认配置"""
        # 删除环境变量,使用默认值
        monkeypatch.delenv("APP_MODE", raising=False)
        monkeypatch.delenv("DEBUG", raising=False)

        config = get_config()

        assert config["mode"] == "production"
        assert config["debug"] is False

    # 使用 capsys 测试输出
    def test_print_config(self, capsys, test_env):
        """测试配置输出"""
        config = get_config()
        print(f"Running in {config['mode']} mode")

        captured = capsys.readouterr()
        assert "Running in test mode" in captured.out
pytest.ini
[pytest]
addopts = -v --strict-markers
testpaths = tests
markers =
    slow: marks tests as slow to run
    integration: marks tests as integration tests
如何运行?
在 my_project 根目录下,直接运行 pytest 命令。
pytest
预期输出:
============================= test session starts ==============================
...
collected 8 items

tests/test_file_processor.py::TestFileProcessor::test_process_file_with_tmp_path PASSED [ 12%]
tests/test_file_processor.py::TestFileProcessor::test_process_shared_file PASSED [ 25%]
tests/test_file_processor.py::TestFileProcessor::test_process_empty_file PASSED [ 37%]
tests/test_file_processor.py::TestConfig::test_get_config_with_env PASSED [ 50%]
tests/test_file_processor.py::TestConfig::test_get_config_default PASSED [ 62%]
tests/test_file_processor.py::TestConfig::test_print_config PASSED [ 75%]
tests/test_math_operations.py::TestMath::test_add PASSED [ 87%]
tests/test_math_operations.py::TestMath::test_divide_parametrized[10-2-5.0] PASSED [100%]

============================== 8 passed in ...s ===============================
这个实战示例展示了如何:
- 结合使用多个内置 fixtures(
tmp_path,tmp_path_factory,monkeypatch,capsys) - 使用
conftest.py提供共享 fixtures - 在一个测试文件中结合使用测试类、参数化和异常测试
- 组织项目结构以支持复杂的测试场景
总结
这个教程涵盖了 Pytest 最核心和最常用的功能,特别是强大的内置 fixtures。掌握了这些,你已经可以高效地为你的项目编写健壮的测试了。
学习路径建议
- 从编写简单的
test_函数和使用assert开始。 - 学习使用 Fixture 来管理测试的准备和清理工作。
- 掌握内置 Fixtures:
tmp_path用于文件系统测试monkeypatch用于 Mock 和修改对象capsys用于捕获输出request用于高级 fixture 配置tmp_path_factory用于共享临时资源
- 使用
conftest.py来组织和共享你的 Fixtures,使其在整个测试套件中可用。 - 当你发现测试用例重复时,使用
@pytest.mark.parametrize进行参数化。 - 当测试集变大时,使用 Markers (
@pytest.mark) 来组织和筛选测试。 - 通过
pytest.ini配置文件来固化你的测试习惯。 - 根据需要,探索并使用插件来扩展 Pytest 的功能。
内置 Fixtures 快速参考
| Fixture | 作用域 | 用途 | 返回类型 |
|---|---|---|---|
tmp_path | function | 创建临时目录 | pathlib.Path |
tmp_path_factory | session | 创建共享临时目录 | TempPathFactory |
capsys | function | 捕获 stdout/stderr | CaptureFixture |
capfd | function | 捕获文件描述符输出 | CaptureFixture |
monkeypatch | function | Mock 和修改对象 | MonkeyPatch |
request | function | 访问测试请求信息 | FixtureRequest |
最好的学习方法是实践。尝试为你自己的项目编写测试,或者为一个你喜欢的小型开源项目贡献测试代码。
要了解更多信息,请随时查阅 Pytest 官方文档。